How to Program Your Garage Door Opener Remote
(For Any Brand)

Moving into a new home, misplacing your remote, replacing dead batteries, or syncing to a new vehicle are all common reasons to reprogram your garage door opener. Understanding how to program a garage door opener remote is an essential skill for homeowners. Whether you need to program a LiftMaster garage door opener, program a Chamberlain garage door remote, or figure out how to reprogram a garage door opener of any brand, this guide has you covered.
This comprehensive guide covers programming methods for all major brands including Chamberlain, LiftMaster, Genie, Craftsman, and more. Whether you’re wondering how to program a garage door remote, need to reset your garage door opener, or trying to sync with your vehicle’s built-in system, we’ve got you covered with easy-to-follow instructions. Even if you’re using a universal remote, these steps will help you restore functionality to your garage door opener.
Step-by-Step Guide – How to Program a Garage Door Opener Remote
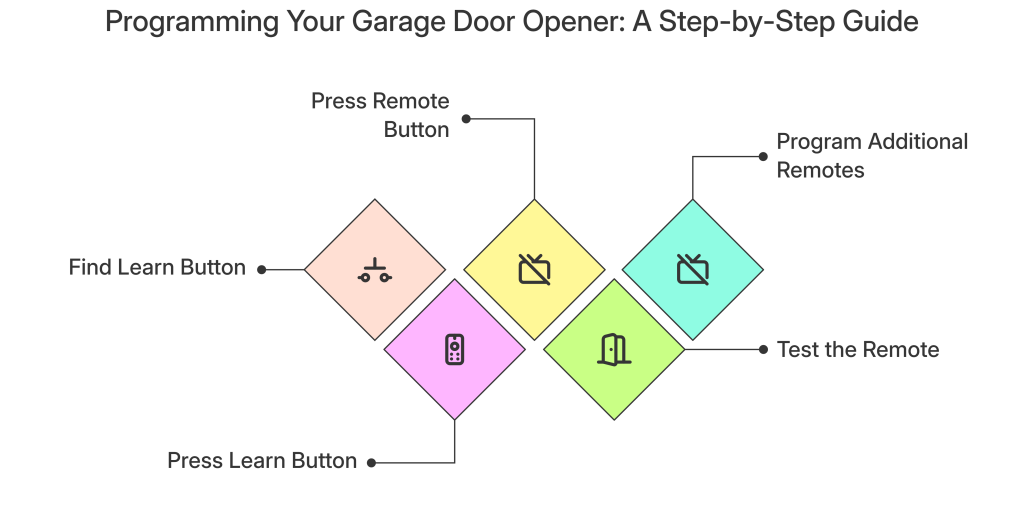
Step 1 – Locate the “Learn” or “Program” Button
The programming process begins with finding the “Learn” button on your garage door opener’s motor unit—the box attached to your garage ceiling. This button is typically located on the back or side of the motor unit and is often color-coded to make it easier to identify.
- Chamberlain/LiftMaster/Craftsman: Look for a round or square button, usually purple, yellow, orange, or red
- Genie: Usually a red button on newer models
- Linear: Typically a red or yellow button
- Wayne Dalton: Often labeled as “Program” rather than “Learn”
- Overhead Door: Usually a red or black button on the back panel
If you’re having trouble locating the button, check the motor unit’s light lens, which sometimes has the button built-in. Alternatively, remove the light cover to find it inside.
Step 2 – Press and Release the Learn Button
Once you’ve found the Learn button:
- Position yourself so you can reach both the motor unit and have your remote in hand
- Press and release the Learn button quickly—don’t hold it down (holding for too long can erase all programmed devices)
- You’ll notice an indicator light will begin blinking, or you’ll hear a click
- This activation gives you approximately 30 seconds to complete the next step before the system times out
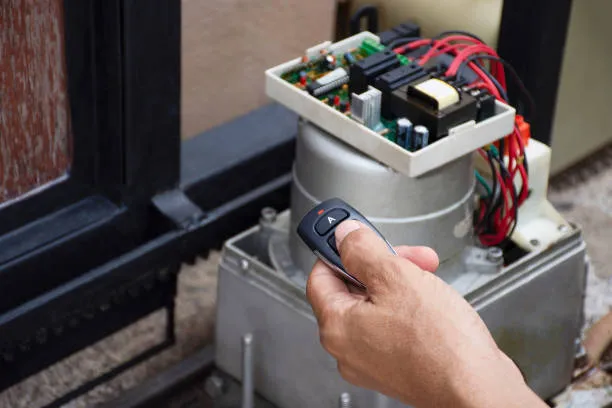
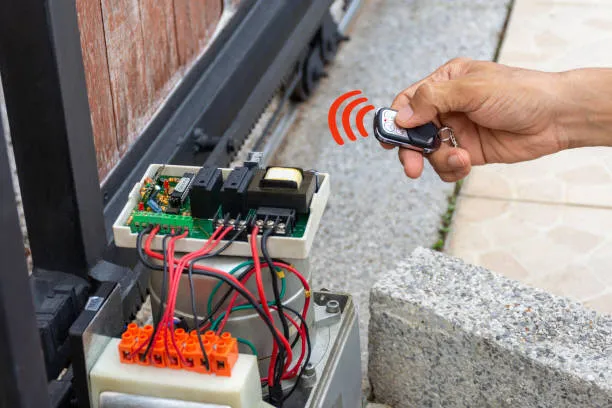
Step 3 – Press the Remote Button
With the opener in learning mode:
- Hold your remote approximately 2-6 inches from the motor unit (not necessary but helps ensure a strong signal)
- Press and hold the button on your remote that you want to program
- Hold it for 2-3 seconds until you see the opener’s light blink or hear a click
- For multi-button remotes, repeat this process for each button you want to program (typically with a different garage door opener)
Step 4 – Test the Remote
After programming is complete:
- Move away from the opener to a normal usage distance
- Press the remote button to verify the garage door responds correctly
- If the door doesn’t respond, repeat steps 1-3
- If it still doesn’t work, check your remote’s battery and ensure it’s compatible with your opener model
Step 5 – Repeat for Additional Remotes
If you have multiple remotes that need programming:
- Within 30 seconds of programming the first remote, press the button on any additional remote
- Most opener systems allow you to program multiple remotes (typically 8-12 devices, depending on the model)
- For keypad programming, follow the manufacturer-specific instructions below
Comparison Table – Remote Types & Compatibility
Remote Type | Compatibility | Features | Common Brands |
Standard Remote | Universal with matching frequency | One to four buttons, simple operation, range of 25-100 feet | LiftMaster, Genie, Chamberlain, Craftsman |
Keypad | Most modern openers | Wall-mounted, PIN access, no need to carry a remote | Chamberlain, LiftMaster, Genie |
In-Car Remote | HomeLink or Car2U compatible openers | Built-in car integration, no separate remote needed | HomeLink (90+ car brands), Car2U (GM, Chrysler) |
Smart Remote | Wi-Fi enabled openers | Smartphone control, remote access, notifications | MyQ (Chamberlain/LiftMaster), Genie Aladdin Connect |
Universal Remote | Most major brands | Can be programmed to multiple brands, replacement for lost remotes | Chamberlain Universal, Genie Universal |
Brand-Specific Programming Instructions
Different manufacturers use slightly different programming methods. Here are instructions for the most common brands:
Chamberlain/LiftMaster/
Craftsman
- Press and release the purple/yellow/orange Learn button
- Within 30 seconds, press and hold the remote button
- Release when the opener lights blink or you hear a click
For MyQ-enabled devices: You may need to use the MyQ app for programming smart features.
Genie
- Press and hold the Learn button until the LED indicator turns on
- Press the remote button twice
- The LED will blink and then stay solid when programming is complete
For Intellicode remotes: You may need to press an additional “Program” button on the remote itself before beginning.
Linear/Moore-O-Matic
- Press the Learn button until the indicator light comes on
- Press the remote button twice
- The indicator light will blink to confirm programming
Wayne Dalton/Overhead Door
- Press and hold the Program button until the light comes on
- Press the remote button until the light blinks
- Press the same remote button again to confirm
How to Program a Garage Door Opener Keypad
Wall-mounted keypads use a slightly different programming process:
- Locate the Learn button on the motor unit and press it
- On the keypad, enter a 4-digit PIN of your choice
- Press the Enter button (sometimes labeled as “PROG” or “✓”)
- The opener lights will blink or you’ll hear a click to confirm programming
- Test by entering your PIN and pressing Enter
For wireless keypads: Make sure to replace batteries before programming and follow brand-specific instructions as some require additional steps.
How to Program a Garage Door Opener to a Car
Modern vehicles with built-in garage door controls (HomeLink or Car2U) require a slightly different approach:
HomeLink Programming:
- Clear existing programming by holding the two outer HomeLink buttons until the indicator light blinks
- Position yourself in your car with the engine running
- Hold your original remote 1-3 inches from the HomeLink button you want to program
- Press and hold both the HomeLink button and the original remote button simultaneously
- Hold until the HomeLink indicator light changes from slowly blinking to rapidly blinking or solid
- Go to your garage door opener motor unit and press the Learn button
- Return to your vehicle and press the programmed HomeLink button for 2 seconds
Car2U Programming:
- Press and hold the two outer Car2U buttons until the indicator light blinks
- Press and hold the Car2U button you want to program
- While holding the Car2U button, press and hold the button on your original remote
- Continue holding both until the indicator light changes pattern
- Go to your garage door opener motor unit and press the Learn button
- Return to your vehicle and press the programmed Car2U button to test
How to Reset a Garage Door Opener Code
If you’re concerned about security or experiencing issues, you might need to reset your opener completely:
- Press and HOLD the Learn button for 6-10 seconds (time varies by brand)
- Release when the indicator light turns off or blinks
- This erases ALL programmed devices (remotes, keypads, car controls)
- You’ll need to reprogram all your devices following the steps above
FAQ Section
How do I program a garage door opener?
Programming a garage door opener involves locating the Learn button on your opener unit, pressing it to put the opener in programming mode, and then pressing the button on your remote control. Most modern openers from brands like LiftMaster, Chamberlain, and Genie follow this general process, though specific steps may vary slightly by model.
How do I reset my garage door opener?
To reset your garage door opener, press and hold the Learn button on your opener unit for 6-10 seconds until the indicator light turns off or blinks. This erases all programmed devices, allowing you to start fresh with programming your remotes, keypads, and other access devices.
How do I reprogram my garage door opener?
To reprogram your garage door opener, you’ll first want to reset the opener (by holding the Learn button for 6-10 seconds), then follow the standard programming process: press the Learn button briefly, then press the remote button within 30 seconds. This process works for most major brands including LiftMaster, Chamberlain, and Genie.
How do I program a LiftMaster garage door remote?
To program a LiftMaster garage door remote, locate the yellow, purple, or orange Learn button on the motor unit, press and release it, then press and hold the remote button until the opener lights blink or the motor unit clicks. Test the remote to confirm successful programming.
How do I program a Chamberlain garage door remote?
To program a Chamberlain garage door remote, find the Learn button (usually purple, yellow, or orange) on the motor unit, press and release it, then within 30 seconds press and hold the button on your remote until the opener lights blink or you hear a click. Test to ensure proper operation.
Can I program a garage door remote without a Learn button?
Some older models (pre-1993) use DIP switches instead of Learn buttons. Look for a panel of small switches on both the opener and remote. Set the switches on the remote to match the pattern on the opener exactly. If your opener has no Learn button or DIP switches, consult the manual or consider upgrading your system.
How do I program a universal garage door remote?
Programming a universal garage door remote typically involves:
- Identifying your garage door opener brand and model
- Setting the universal remote to the correct frequency (usually with DIP switches or a selector button)
- Following the standard programming process: press the Learn button on your opener, then press the button on your universal remote
- Testing to confirm successful pairing
- Consulting the universal remote’s manual for brand-specific codes if needed
What if my remote won't sync?
Common troubleshooting steps include:
- Replace the battery in your remote
- Ensure you’re within range during programming
- Check compatibility between your remote and opener
- Reset the opener and try again
- Clean the remote’s contacts with rubbing alcohol
- Make sure the antenna on the motor unit isn’t damaged
- For persistent issues, consider contacting a professional garage door repair service
Can I reprogram an old remote?
Yes, as long as it’s compatible with your current opener. Most remotes from the same manufacturer will work across multiple generations, though very old remotes (20+ years) may use incompatible technology.
Do I need to reset my old code first?
Not typically for adding new remotes. However, if you’re concerned about security (lost remote, moving into a new home), it’s best to completely reset the opener and program all devices fresh.
Pro Tips & Mistakes to Avoid
`Always Check the Door First
Before programming your garage door opener remote, ensure that your garage door is in good working condition. If your door isn’t operating smoothly, you might need garage door repair services rather than just remote programming.
`Always Check the Battery First
Before attempting any programming, install a fresh battery in your remote. Many “programming failures” are simply due to weak batteries.
`Don’t Hold the Learn Button Too Long
A quick press is all that’s needed to enter programming mode. Holding the Learn button for 6+ seconds will typically ERASE all programmed devices, forcing you to start over.
`Use Manufacturer Manuals for Brand-Specific Instructions
While this guide covers most common brands, always refer to your specific model’s manual for detailed instructions, especially for newer smart-enabled openers.
`Label Your Remotes
If programming multiple remotes or buttons, use small labels to identify which button operates which door, especially helpful in homes with multiple garage doors.
`Consider Security Updates
If your opener was manufactured before 1993, it likely uses fixed code technology, which is less secure. Consider upgrading to a rolling-code system for better security.
`Troubleshoot Interference
If programming is inconsistent, check for potential sources of interference:
- LED bulbs in or near the opener
- Metal objects near the antenna
- Other electronic devices operating nearby
`Smart Opener Options
If you’re frustrated with remote issues, consider upgrading to a smart garage door opener that offers:
- Smartphone control
- Remote monitoring
- Automatic opening/closing based on your location
- Integration with smart home systems
Final Thoughts
Programming your garage door opener remote doesn’t have to be complicated. By following these simple steps, you can quickly get your remote working correctly. Remember that each manufacturer has slight variations in their programming process, so when in doubt, refer to your owner’s manual or the manufacturer’s website for model-specific instructions.
For most homeowners, the standard programming process will take less than five minutes to complete. If you encounter persistent problems or need assistance with your garage door repair needs, don’t hesitate to contact professional garage door service technicians who can help diagnose more complex issues.
Need Professional Garage Door Services?
If you’re experiencing issues beyond remote programming with your garage door or garage door opener, the experts at Lopes Garage Door Systems Inc. are here to help. Our skilled technicians specialize in:
- Garage door repair services
- Garage door opener installation and repair
- Remote control programming and troubleshooting
- Regular maintenance to prevent future issues
Serving the greater Vaughan area and beyond, our team is committed to restoring the safety and functionality of your garage door system. Don’t let garage door problems compromise your home’s security or convenience—contact us today for professional assistance.
Contact Us for Professional Garage Door Service
Whether you’re setting up a new system, replacing lost remotes, or integrating with your vehicle, these instructions should help you get your garage door opener working smoothly again. For issues beyond DIY solutions, remember that professional garage door repair services are just a call away.